Is Your AC Struggling to Keep Up? Here's How to Check if Refrigerant Is Low First
How to check if AC refrigerant is low before calling a technician is simpler than most Antelope Valley homeowners realize — and doing it yourself first can save you time and stress. Before you schedule a service call, there are a few quick checks you can do right now, with nothing more than a thermometer and your own eyes and ears.
Here's a fast overview of what to look for:
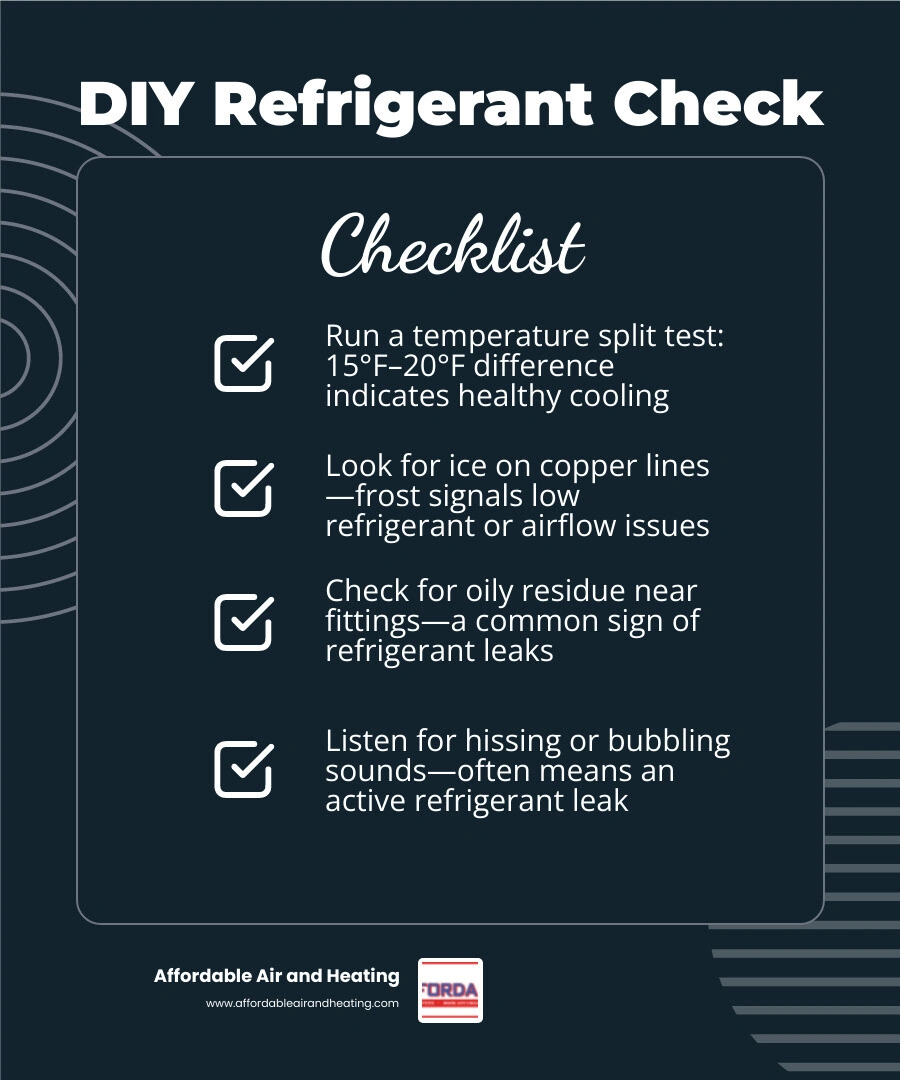
- Run a temperature split test — measure the air at your return vent and the nearest supply register; a healthy system shows a 15°F–20°F difference
- Look for ice on the copper lines — frost or ice on the refrigerant lines outside is a red flag
- Check for oily residue — dark, greasy stains near copper fittings often mean refrigerant is escaping
- Listen for hissing or bubbling — these sounds near your indoor or outdoor unit point to an active leak
- Notice if your AC runs constantly — if it never reaches your set temperature, refrigerant could be the culprit
Roughly 40% of all cooling service calls come down to one cause: low refrigerant from a leak. In the Antelope Valley, where summer temperatures regularly push past 100°F, a struggling AC isn't just uncomfortable — it can put real strain on your family and your system. The good news is that several of the most telling signs are completely visible (and audible) without any special tools.
Key how to check if ac refrigerant is low before calling a technician vocabulary:
- AC troubleshooting before calling a pro
- AC not cooling but running what to check first
- Circuit breaker tripping when AC turns on what to do
Why Airflow and Filters Matter Before Assuming Low Refrigerant
Before we dive into the refrigerant lines, we need to talk about the most common "imposter" in the HVAC world: the dirty air filter. A clogged, dust-caked air filter restricts airflow so severely that it behaves almost identically to a system with low refrigerant.
When airflow is restricted, your indoor evaporator coil doesn't get enough warm air passing over it to transfer heat. Because the heat transfer process is interrupted, the temperature of the coil drops below freezing. Moisture from your indoor air condenses on the freezing coil and instantly turns to ice. This creates a solid block of ice that blocks airflow entirely, eventually traveling down the copper lines to your outdoor unit.
If you jump to the conclusion that your system is low on refrigerant without checking the filter, you might pay for a diagnostic visit only to find out you just needed a new air filter. This is why we always recommend starting with basic AC troubleshooting before calling a pro.
To rule out airflow issues:
- Turn off your AC system completely to let it thaw if you notice any ice.
- Check your air filter. If it looks grey, dusty, or clogged, replace it immediately.
- Ensure all indoor supply vents and return grilles are open and completely unobstructed by furniture, curtains, or rugs.
- Clear away any windblown desert dust, tumbleweeds, or debris from around your outdoor condenser unit.
If your filter is clean and your vents are open, but you are still dealing with an AC not cooling but running: what to check first becomes your next step. Once airflow is ruled out, we can safely look closer at the refrigerant charge.
How to Check if AC Refrigerant Is Low Before Calling a Technician
To understand how to identify low refrigerant, it helps to understand how it behaves. Your air conditioner's refrigerant operates in a hermetically sealed, closed-loop system. Unlike the fuel in your car, refrigerant is never consumed, degraded, or "used up" over time. It simply circulates back and forth between your indoor and outdoor units, absorbing heat from your home and releasing it outside.
If your system's refrigerant level is low, there is only one explanation: you have a physical leak.
Refrigerant leaks generally develop over time due to a few common factors:
- Vibration Damage: The normal, everyday operation of your outdoor compressor causes subtle vibrations. Over years of running through hot Antelope Valley summers, these vibrations can cause copper lines to rub against other metal components or weaken joints, leading to tiny cracks.
- Formic Erosion: This chemical process occurs when microscopic formic acid (often created by household cleaning products, paints, or building materials reacting with indoor humidity) slowly corrodes the copper evaporator coils, creating tiny pinhole leaks.
- Installation Defects: Poorly soldered joints or loose service valves from a sub-par installation can slowly leak refrigerant over time.
Because finding a leak requires specialized tools, learning how to detect refrigerant leaks in AC units is key to protecting your system from long-term damage. Fortunately, you can perform several budget-friendly diagnostic checks on your own before bringing in a professional.
Step 1: Perform a Temperature Difference (Delta T) Test
The absolute most reliable, gauge-free way to check your AC’s performance is the Temperature Difference test, also known in the HVAC industry as "Delta T." This test measures how efficiently your air conditioner is absorbing heat from your indoor air.
To perform this test on a budget, all you need is a standard digital thermometer. Follow these steps:
- Prep the System: Turn on your AC and let it run for at least 15 to 20 minutes. This allows the system pressures and temperatures to stabilize. Note: The outdoor temperature must be at least 70°F for this test to be accurate.
- Measure the Return Air: Place your thermometer against the return air grille (the large vent where air is sucked into your system, usually where your filter is located). Record the temperature.
- Measure the Supply Air: Find the supply register (the vent blowing cold air) that is physically closest to your indoor air handler or furnace. Place your thermometer inside the vent and record the temperature.
- Calculate the Split: Subtract the supply air temperature from the return air temperature.
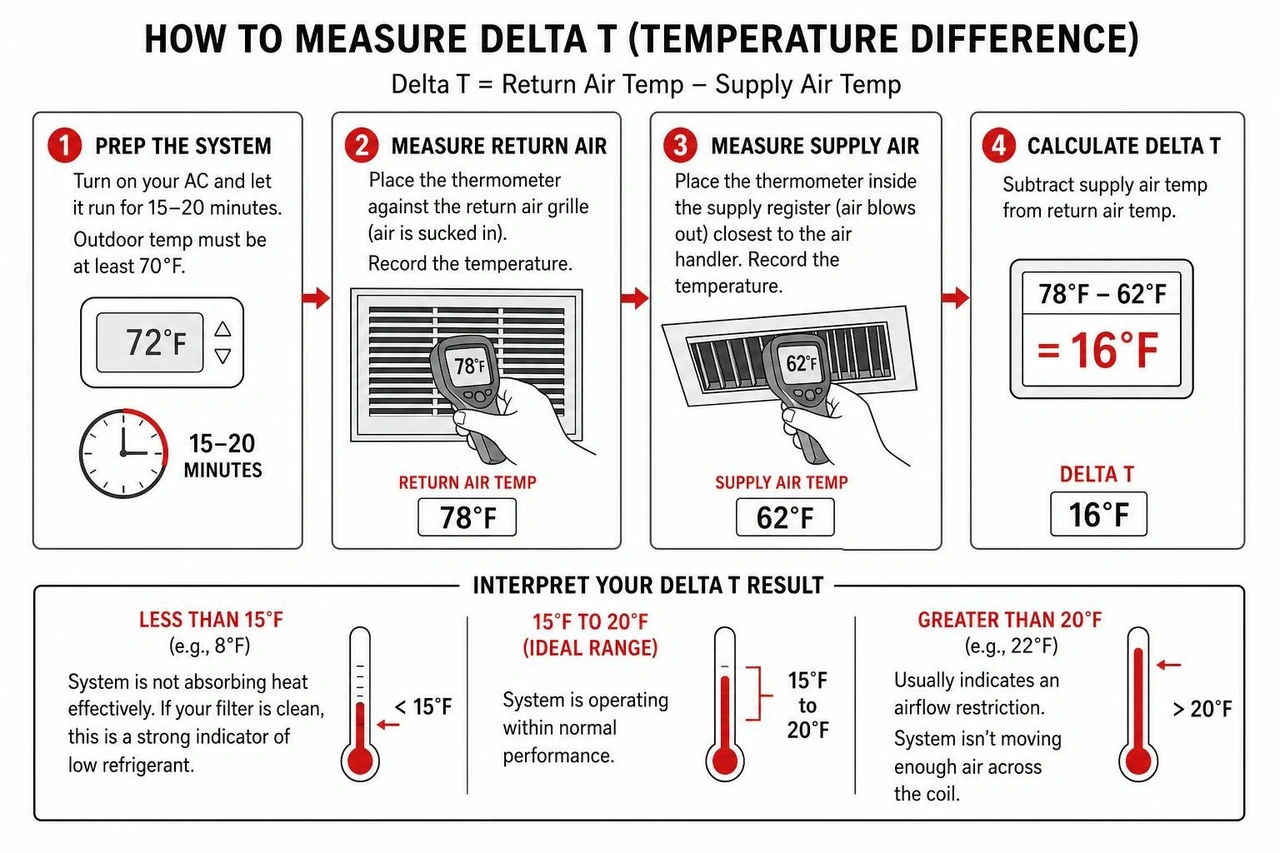
A properly functioning system should have a temperature difference (Delta T) between 15°F and 20°F.
- If the difference is less than 15°F (for example, your return air is 78°F and your supply air is 70°F, a split of only 8°F), your system is not absorbing heat effectively. Assuming your air filter is clean, this is a very strong indicator of low refrigerant.
- If the difference is greater than 20°F, it usually indicates an airflow restriction rather than a refrigerant issue, meaning your system isn't moving enough air across the coil.
Step 2: Look for Visual Signs of Low Refrigerant
Your next step is a simple visual inspection of your indoor and outdoor equipment.
First, walk outside to your condenser unit and locate the two copper lines entering the cabinet. One line is thin and warm to the touch (the liquid line), and the other is thicker and insulated with black foam (the suction line).
- Ice or Frost Buildup: If you see ice or frost forming on the bare copper of the suction line, or on the brass service valves of the outdoor unit, your refrigerant pressure is likely running dangerously low. This pressure drop causes the indoor evaporator coil to drop below freezing, and that ice eventually creeps all the way out to the outdoor unit. If you find your system in this state, read up on why is your AC unit frozen to understand how to thaw it safely.
- Oily Residue and Dark Stains: Refrigerant doesn't travel alone; it circulates alongside a specific lubricating oil designed to keep your compressor running smoothly. When refrigerant escapes through a leak, it carries some of this oil with it. Look closely at the copper joints, service valves, and the base of your outdoor unit. If you notice greasy, oily stains that have accumulated dark desert dust, you are likely looking at the exact site of a refrigerant leak. Understanding determining why your AC is leaking can help you pinpoint whether you are dealing with a water drainage issue or a chemical refrigerant leak.
Step 3: Listen for Hissing or Bubbling Noises
While you are inspecting your indoor and outdoor units, turn off your TV or any loud appliances and listen closely to your equipment.
Because refrigerant is held under immense pressure within your AC lines, a physical leak often makes distinct noises:
- A Hissing Sound: This indicates a high-pressure gas leak, typically found on the vapor side of the system or near the evaporator coil. It often sounds like a slow leak in a bicycle tire or a faint "soda fizzing" sound.
- A Bubbling or Gurgling Sound: If the leak is located on the liquid line or in a section of the system where the refrigerant is in a liquid state, you may hear a bubbling noise as gas bubbles escape through the liquid mixture.
If you hear either of these sounds coming from your indoor closet, attic air handler, or outdoor condenser unit while the system is running or immediately after it shuts off, you have a confirmed physical leak that requires professional attention.
Can Homeowners Use Gauges to Check if AC Refrigerant Is Low Before Calling a Technician?
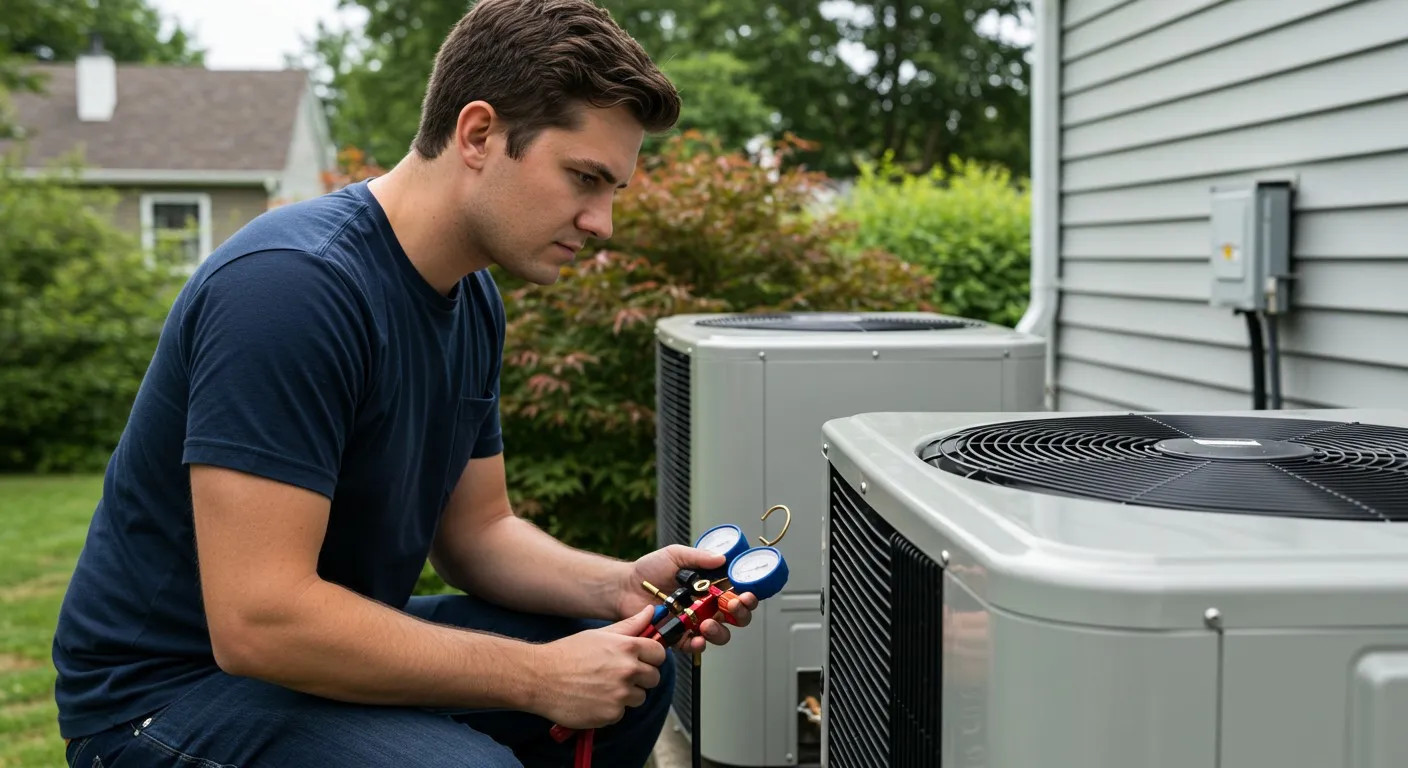
We are often asked if a handy homeowner can buy a cheap manifold gauge set online to check their own refrigerant pressures. While it is technically possible to purchase the tools, we strongly advise against DIY pressure testing.
First and foremost, under EPA Section 608 regulations, it is illegal for anyone without proper federal certification to handle, purchase, or introduce chemical refrigerants into an HVAC system.
Additionally, connecting gauges presents significant safety hazards:
- Liquid Refrigerant Burns: Refrigerant is stored under extreme pressure. For R-410A systems, normal low-side pressure is typically between 125-135 PSI, and high-side pressure can soar between 340-380 PSI when running. Disconnecting a hose incorrectly can release a blast of liquid refrigerant, causing instant, severe frostbite or chemical burns to your skin and eyes.
- System Contamination: Introducing moisture, dirt, or non-compatible air into a sealed refrigerant loop can permanently damage the compressor or cause acid buildup inside the lines.
- Inaccurate Diagnostics: Reading gauges isn't as simple as checking tire pressure. A professional technician doesn't just look at PSI; they must measure pipe temperatures to calculate complex metrics like "superheat" and "subcooling" to accurately diagnose a system. A low-pressure reading on the blue gauge doesn't always mean low gas—it can easily indicate a severe indoor airflow restriction instead.
When to Stop and How to Check if AC Refrigerant Is Low Before Calling a Technician Safely
If you have performed your Delta T test, checked your air filter, and spotted visual signs like ice or oily residue, it is time to put down the household tools and call in a professional.
When our certified technicians arrive to address a suspected refrigerant issue, we don't just "top off" the system. Simply adding more refrigerant to a leaking system is a waste of your hard-earned money and is legally restricted under EPA rules for many systems. Instead, we perform a thorough, multi-step process:
- Electronic Leak Detection: We use highly sensitive electronic leak detectors (often called "sniffers") that can pinpoint microscopic refrigerant leaks down to a fraction of an ounce per year.
- Nitrogen Pressure Testing: If the leak is buried deep inside a coil, we may isolate the components and pressurize them with dry nitrogen to find the drop in pressure.
- Bubble and UV Dye Testing: We apply specialized soap solutions to joint connections to watch for expanding bubbles, or inject safe UV dyes that glow under a blacklight at the leak site.
- Vacuum Pulling: Once the leak is physically repaired or the compromised coil is replaced, we use a vacuum pump to evacuate all moisture and air from the system before recharging it precisely by weight using digital scales.
We will also help you navigate the repair-versus-replace decision. If your older system still runs on R-22 (Freon), which has been completely phased out, or if it is over 10 to 12 years old and the leak repair costs exceed 50% of the system's value, we will walk you through energy-efficient replacement options.
The Risks of Running an AC with Low Refrigerant
It can be tempting to ignore a slightly underperforming AC and let it run anyway, especially during a scorching Palmdale or Lancaster summer afternoon. However, running your air conditioner with low refrigerant is a recipe for catastrophic system failure.
When refrigerant levels are low, your compressor—the "heart" of your AC and the most expensive component to replace—has to work up to 30% harder and run much longer to cool your home. Because refrigerant is also responsible for cooling the compressor motor itself, a low charge causes the compressor to overheat rapidly.
Additionally, an incorrect refrigerant level can reduce your AC's overall operating efficiency by 5% to 20%. This means your system is running constantly, pulling massive amounts of electricity from the grid, and driving your monthly utility bills sky-high, all while failing to make your living room comfortable. Over time, this constant strain drastically shortens your system's overall lifespan, turning a minor leak repair into an early, expensive system replacement.
Frequently Asked Questions about AC Refrigerant
Does AC refrigerant ever need to be topped off regularly?
No. An air conditioning system is a completely closed loop. Refrigerant is never consumed, burned, or worn out like engine oil. If your system is low on refrigerant, it is because a physical leak has developed somewhere in the copper lines or coils. Simply topping off a leaking system without finding and repairing the leak is ineffective and bad for your system.
How do I know if my AC uses R-22 or R-410A refrigerant?
You can easily check the specification label on your outdoor condenser unit. Look for a metal data plate on the side of the cabinet; it will clearly list the refrigerant type as either R-22 (common in systems installed before 2010) or R-410A (the standard for newer systems). This matters because R-22 has been phased out due to environmental regulations, making it incredibly scarce and expensive to source, while R-410A is also undergoing a federal phase-down in favor of newer, lower-GWP alternatives like R-454B.
What should I expect during a professional refrigerant check and repair?
During a professional check, a technician will connect calibrated gauges to measure your system's pressures, temperatures, and calculate superheat and subcooling. If a leak is confirmed, they will use electronic sniffers or bubble solutions to find the leak. Once located, they will recover the remaining refrigerant safely, repair the leak (or replace the leaking coil), pull a deep vacuum to remove moisture, and recharge the system with fresh refrigerant precisely by weight according to manufacturer specifications.
Conclusion
Taking the time to check your air filter and perform a simple, budget-friendly Delta T test can save you from an unnecessary service call. If your temperature split is off, or if you spot ice and oily stains on your outdoor lines, you now have the knowledge to communicate clearly with a professional technician.
At Affordable Air and Heating, we have been keeping families comfortable across the Antelope Valley since 1996. As a family-owned business, we pride ourselves on offering practical, energy-efficient solutions and flexible financing to fit your budget.
If you suspect your system is running low on refrigerant, don't wait for your compressor to give out in the high desert heat. Contact us today through our Affordable Air and Heating Air Conditioning Services page, and let our EPA-certified experts restore your home's comfort safely and affordably.