How Is a Ductless Mini Split Installed Step by Step: What You Need to Know
Understanding how is a ductless mini split installed step by step can save you time, money, and a lot of frustration — especially if you're dealing with the brutal summer heat or cold winter nights in the Antelope Valley. Here's a quick overview of the full process:
- Mount the indoor air handler on an exterior wall using a level mounting bracket secured to wall studs
- Drill the wall penetration hole at a slight downward angle to allow proper condensate drainage
- Secure the outdoor condenser unit on a level concrete pad or wall brackets with adequate airflow clearance
- Connect the refrigerant line set using properly flared copper fittings tightened to manufacturer torque specs
- Run the electrical wiring on a dedicated circuit using the correct gauge communication cable
- Vacuum the refrigerant lines with a vacuum pump and micron gauge to remove all air and moisture
- Power on and test the system for leaks, proper drainage, and correct operation before finalizing
That's the short version. But each step has real details that determine whether your system runs efficiently for 15+ years or starts causing problems within the first two summers. Most system failures trace back to installation errors — not the equipment itself. The sections below walk through everything you need to know.

Understanding the Components of a Ductless System
Before we jump into the physical labor, it helps to understand what you are actually installing. A ductless mini split is a highly efficient heating and cooling system that does not rely on traditional, leaky ductwork. In fact, leaky ducts can waste up to 30% of a home's heating and cooling energy. By eliminating ducts entirely, mini splits deliver conditioned air directly to individual rooms, making them incredibly efficient.
The system is comprised of four primary components:
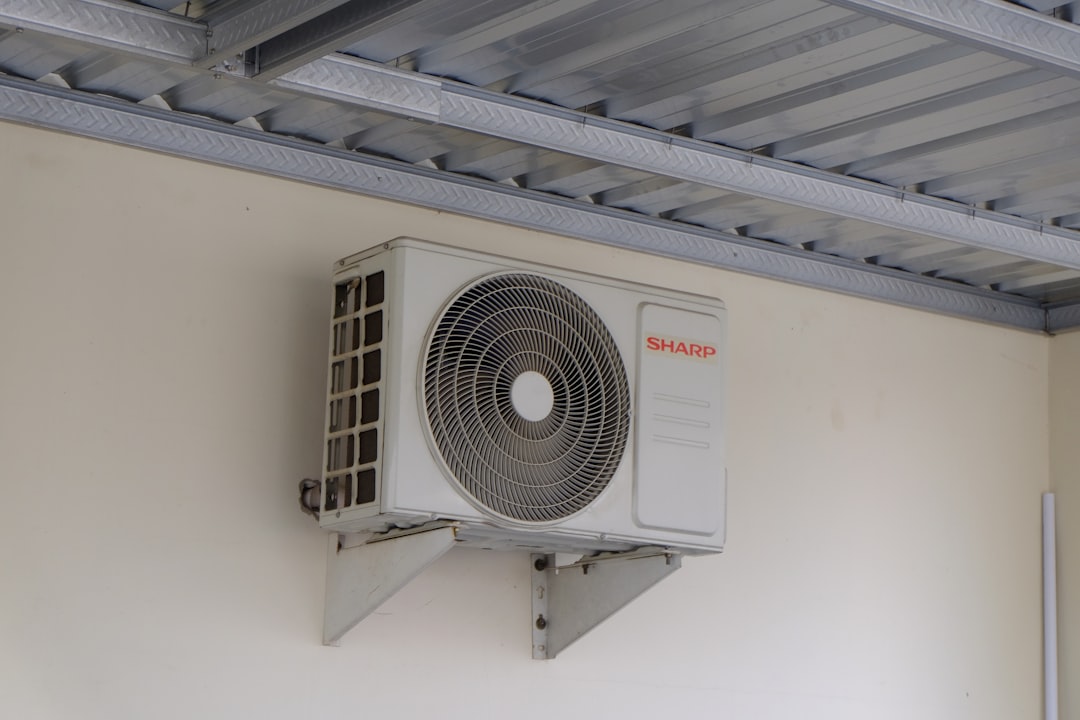
- The Indoor Air Handler: This sleek, wall-mounted unit contains the evaporator coil, a quiet blower fan, and air filtration. It operates at incredibly quiet sound levels, usually between 19 and 30 decibels (quieter than a whisper).
- The Outdoor Condenser: This sits outside your home and houses the compressor and condenser coil. It is responsible for releasing heat during the summer or pulling heat from the outdoor air during our chilly desert winters.
- The Refrigerant Line Set: Copper lines that carry refrigerant back and forth between the indoor and outdoor units, transferring heat in the process.
- The Condensate Drain Line: A small PVC or flexible pipe that carries moisture squeezed out of your indoor air safely outside.
By understanding The Benefits of Mini Splits, you can appreciate the engineering behind these systems. Modern mini splits feature advanced inverter-driven compressors that adjust their speed continuously (like a dimmer switch) rather than cycling on and off. This technology allows them to achieve impressive SEER2 ratings of 20 to 30+ for cooling and HSPF2 ratings of 10 to 13 for heating.
Pre-Installation: Sizing, Tools, and Placement
A successful installation begins long before you pick up a drill. The very first step is ensuring your system is sized correctly. If a system is undersized, it will run constantly without ever cooling your room; if it is oversized, it will cycle on and off rapidly (short-cycling), which wastes energy and wears out the compressor prematurely.
To determine the ideal capacity, we perform a detailed Manual J load calculation. This looks at your room's square footage, ceiling height, insulation quality, window sizes, and local climate conditions. Generally, a 500-square-foot space requires a 12,000 BTU unit, while larger spaces of 1,000 square feet or more may need 24,000 BTU or higher.
Next, gather your essential tools:
- A reliable stud finder
- A level (absolutely critical for drainage)
- A hole saw (typically 3 inches in diameter)
- A torque wrench and flare tool
- A vacuum pump and micron gauge
- Safety glasses and heavy-duty work gloves
Finally, you must determine the optimal locations for both units. To keep your system running beautifully, you should plan to Optimize Ductless AC Placement carefully.
How is a ductless mini split installed step by step for optimal placement?
For the indoor unit, choose an exterior wall where the refrigerant lines can exit directly to the outside. The unit should be mounted at least 6 to 8 feet off the floor, with at least 6 inches of open clearance on all sides to allow proper airflow. Avoid placing it near fluorescent lights or electronic devices that might interfere with the remote control signal.
For the outdoor unit, pick a shaded, well-ventilated spot on the north or east side of your home if possible. This keeps the condenser out of the direct, punishing afternoon sun of Lancaster or Palmdale, maximizing its cooling efficiency. Ensure there is at least 12 to 24 inches of open clearance around the unit to prevent hot air from recirculating. Properly planning these locations allows you to Optimize Home with Mini Split Zones and ensure perfect comfort room by room.
How Is a Ductless Mini Split Installed Step by Step?
Now let's roll up our sleeves and walk through the physical setup. Remember to take your time; rushing this process is how mistakes happen.
Step 1: Mount the Indoor Air Handler
The indoor unit hangs on a metal mounting plate. It is vital that this plate is anchored securely and sits perfectly level.
- Hold the mounting bracket against your chosen wall.
- Use a stud finder to locate the wall studs. You must secure the bracket to at least two studs to support the weight of the air handler (which typically weighs 40 to 50 pounds).
- Use a bubble level to ensure the bracket is perfectly horizontal. If it sits crooked, condensate water will overflow the drain pan and run down your interior drywall.
- Mark the screw locations, drill pilot holes, and secure the plate using heavy-duty weight-bearing fasteners or toggle bolts.
Step 2: Drill the Wall Penetration Hole
Next, you need to create a pathway through the wall for the line set, control wiring, and drain pipe.
- Use the manufacturer's cardboard template or measure the back of your air handler to mark the exact location for the hole. This hole is usually positioned to the lower left or right of the mounting plate.
- Using a 3-inch hole saw, drill slowly through the interior drywall.
- Crucial Tip: Drill at a slight downward angle (about a quarter-inch drop per foot) toward the outside. This downward slope is necessary because the condensate drain relies purely on gravity to carry water away.
- When drilling through exterior siding, switch your drill to reverse (counterclockwise) to prevent the siding from cracking or splintering. Insert a plastic sleeve or wall conduit to protect the lines from sharp edges.
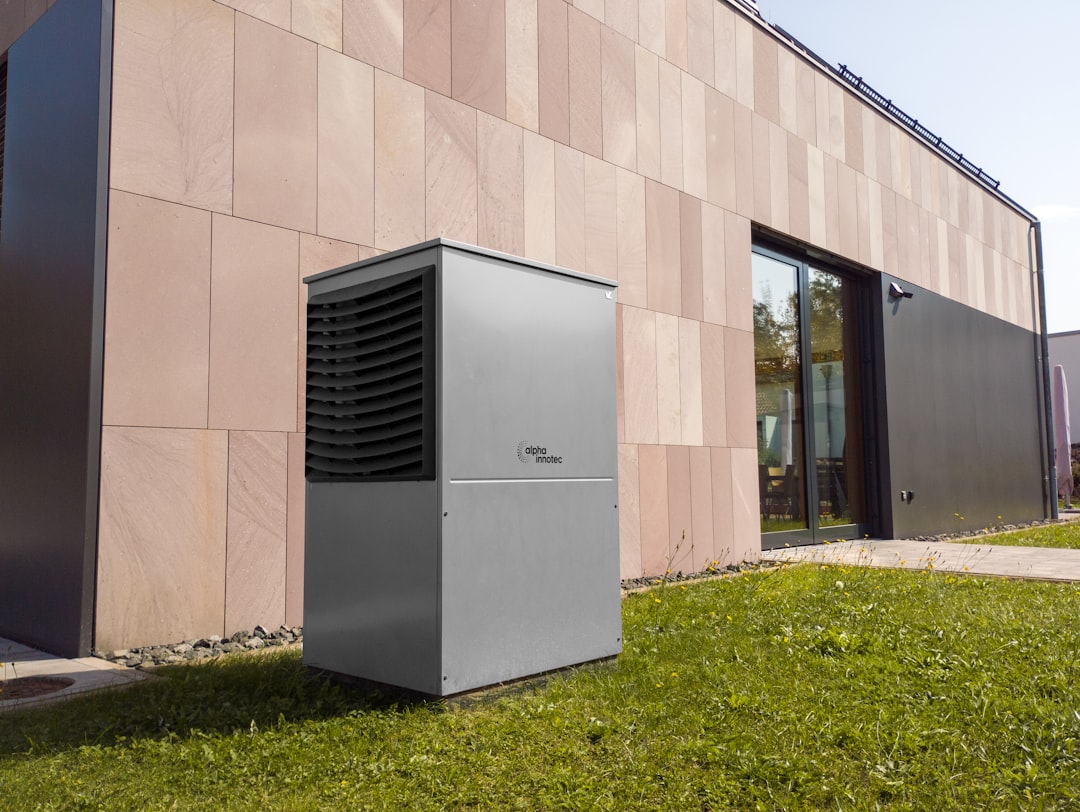
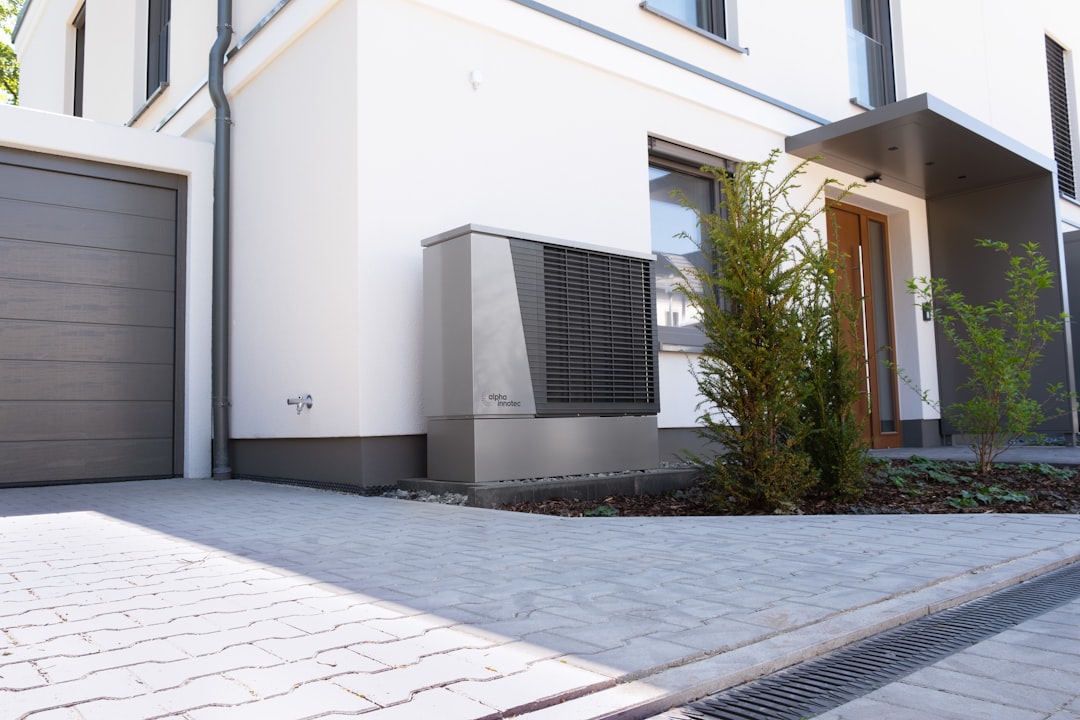
Step 3: Secure the Outdoor Condenser Unit
The outdoor unit needs a rock-solid, level foundation to prevent vibration and protect internal components.
- Pour a level concrete pad or secure a pre-formed composite equipment pad on a solid ground surface. Alternatively, you can use heavy-duty steel wall brackets anchored directly to your home's foundation.
- Place the condenser unit onto the pad or brackets.
- Install thick rubber vibration isolation pads under the feet of the unit. This dampens operational noise and prevents structural vibration.
- Anchor the feet securely to the pad or brackets to keep the unit stable during strong desert winds.
Connecting the Lines, Electrical Wiring, and Drainage
With both units mounted, it is time to connect them. This is where precision makes all the difference.
| Connection Type | Material / Specification | Key Requirement |
|---|---|---|
| Refrigerant Lines | Insulated copper tubing | Must be flared and torqued precisely to prevent leaks |
| Electrical Wiring | 14/4 AWG stranded wire | Connects terminal blocks; must match color-to-color |
| Condensate Drain | Flexible or rigid PVC | Must slope downward without kinks or traps |
Start by carefully unrolling the copper line set. Feed the line set, the 14/4 AWG stranded communication cable, and the condensate drain line through the 3-inch wall hole from the inside out. Be incredibly careful not to kink the copper tubing as you bend it.
Once outside, route the lines neatly down the wall. Because water must flow freely, keeping up with Mini Split Drainage Maintenance is critical. Make sure the drain line exits at the bottom of the bundle and slopes continuously downward. Proper drainage also plays a major role in Mini Split Humidity Solutions, keeping your indoor air fresh and dry.
How is a ductless mini split installed step by step when connecting refrigerant lines?
Connecting the refrigerant lines is the most critical phase. An improperly tightened fitting will leak refrigerant, causing your system to fail during peak summer heat.
- Cut the copper tubing to length using a sharp pipe cutter. Clean out any copper burrs with a reamer, keeping the tube pointed downward so shavings don't fall inside.
- Slip the flare nut onto the tube, then use a high-quality flaring tool to create a clean, smooth 45-degree flare.
- Align the copper flare with the brass fitting on the unit. Hand-tighten the flare nut first to prevent cross-threading.
- Use a torque wrench to tighten the nut to the manufacturer's exact torque specifications. A properly torqued quick-connect fitting holds refrigerant for fifteen years, while an improperly tightened one can leak across two summers.
- Attach a vacuum pump to the service port and pull the system down to below 500 microns. Hold the vacuum for at least 15 to 30 minutes to prove there are no leaks and that all moisture has been removed from the lines.
- Once the vacuum holds, open the service valves to release the pre-charged refrigerant into the lines.
Why Professional Setup Outperforms DIY in the Antelope Valley
While DIY kits make single-zone installations look tempting, a successful install requires master-level comfort with electrical wiring, building codes, and refrigerant handling. Plan on twelve to sixteen hours of hard work across two days for a complete DIY installation.
Here is why working with us for your Mini Split Installation is the smartest move:
- Permit and Code Compliance: Cities like Palmdale, Lancaster, and Santa Clarita require building and electrical permits for new HVAC installations. We handle all the paperwork and ensure everything is built to code.
- Electrical Safety: Mini splits require a dedicated electrical circuit. Working with high-voltage electricity is dangerous and requires precise panel connections.
- Warranty Protection: Most premium manufacturers will only honor their warranty if the system is installed and commissioned by a licensed HVAC professional. A DIY mistake could leave you paying out of pocket for repairs.
- Maximum Efficiency: Our experienced team uses professional-grade equipment to vacuum, pressure-test, and tune your system, helping you Maximize Mini Split Efficiency and lower your energy bills.
- Long-Term Reliability: We set you up for success right from day one, and we can guide you on Ductless AC Maintenance Best Practices to keep your system running flawlessly for years.
Frequently Asked Questions About Mini Split Installation
Where should the indoor mini split unit be mounted?
The indoor air handler should always be mounted on an exterior wall, high up (at least 6 to 8 feet from the floor), and with at least 6 inches of clearance from the ceiling. This placement ensures optimal air circulation throughout the room, keeps the unit out of the way of furniture, and allows the remote control to maintain a clear line of sight. For more tips on keeping your system clean and accessible, check out our Mini Split Maintenance Tips.
Why does the wall hole need to be drilled at a downward angle?
Because mini splits rely on gravity to drain the condensation collected from your indoor air, the wall hole must slope downward at least a quarter-inch per foot. If the hole is drilled straight or angles upward, water will back up into the indoor unit, causing water damage to your drywall and creating mold issues.
Can I install a traditional mini split system entirely by myself?
While some pre-charged DIY kits exist, installing a traditional mini split system requires special licensing to handle refrigerant lines legally and safely. It also requires advanced tools like vacuum pumps, micron gauges, and torque wrenches. Attempting a fully DIY installation on a traditional system often voids the manufacturer's warranty and risks expensive electrical or refrigerant errors.
Conclusion
Installing a ductless mini split is a fantastic way to bring zoned, energy-efficient comfort to your home, whether you are cooling a converted garage in Santa Clarita or heating a room addition in Lancaster.
Since 1996, Affordable Air and Heating has been the trusted, family-owned HVAC team serving the entire Antelope Valley and Santa Clarita Valley. We pride ourselves on offering energy-efficient solutions, friendly service, and flexible financing options to fit your budget.
If you are ready to upgrade your home comfort, let our experienced team handle the hard work for you. Explore our professional Mini Split Services or contact us today to learn more about our high-efficiency Mini Split Systems. Let us help you stay perfectly comfortable all year long!