Why Cleaning Your Mini Split Indoor Air Handler Keeps Your Home Comfortable Year-Round

Knowing how to clean the indoor air handler on a mini split is one of the most practical things you can do as a homeowner — especially in the Antelope Valley, where systems run hard through blistering summers and cold winters. Dust, pet dander, and moisture build up inside the unit over time, restricting airflow, feeding mold growth, and quietly pushing your energy bills higher. According to the U.S. Department of Energy, proper HVAC maintenance can improve system efficiency by 5% to 30% — and neglected units can lose up to 30% of their operating efficiency from buildup alone.
Here's a quick overview of how to clean the indoor air handler on a mini split:
- Turn off the power at the breaker before touching anything.
- Remove and wash the air filters with warm water and mild soap, then let them air dry completely.
- Clean the evaporator coils using a non-acidic, no-rinse foaming coil cleaner.
- Wipe or gently rinse the blower wheel and fan blades to remove dust film buildup.
- Flush the condensate drain line with a water and white vinegar mixture to prevent clogs and mold.
- Reassemble everything only after all parts are fully dry, then restore power.
Most homeowners in Palmdale and Lancaster should plan on cleaning filters every two to four weeks during peak use, with a full deep clean of the internal components at least once a year — or every six to nine months if you have pets, smokers in the home, or deal with heavy dust.
Why You Need to Maintain Your Ductless System
Ductless mini splits are legendary for their whisper-quiet operation and outstanding zonal climate control. However, unlike traditional central air systems where the mechanical components are hidden away in a garage, closet, or attic, your mini split's air handler lives right on the wall in your primary living spaces. Because it is directly circulating the air you breathe, keeping it clean is vital.
When you stay on top of maintenance, you prevent mold and bacteria from taking up residence in the damp, dark environment of the condensate pan. A neglected unit is a prime breeding ground for organic growth, which can quickly lead to sour or musty odors. Furthermore, regular cleaning directly impacts the lifespan of your system. When dust blankets the internal components, the motor has to work twice as hard to push air through, leading to premature wear and tear on the fan motor and compressor.
By taking the time to care for your system, you protect your investment. To understand more about why these setups are so beneficial for modern homes, check out our guide on Exploring the Advantages of Mini Splits. Additionally, keeping the system clear of debris is the single best way to Maximize Mini Split Efficiency, keeping your utility bills low even when the summer heat in Santa Clarita or Palmdale is at its worst.
Why Knowing How to Clean the Indoor Air Handler on a Mini Split Matters for Air Quality
Living in the Antelope Valley means dealing with unique environmental factors. Between the high winds, desert dust, and seasonal pollen, our indoor spaces collect fine particulate matter at an alarming rate. When your mini split draws in this dusty air, the filters catch a lot of it, but the finest particles eventually make their way to the wet evaporator coils.
Once dust mixes with the condensation naturally produced during the cooling process, it creates a sticky film. This film not only blocks heat transfer but also acts as a food source for mold spores. Every time your system kicks on, it can disperse these allergens back into your bedroom, living room, or home office. For homeowners dealing with high humidity or stale indoor air, understanding how to clean these components can be a game-changer. You can learn more about managing these indoor climate challenges in our article on Mini Split Humidity Solutions Palmdale.
Preparation and Safety Protocols Before You Begin
Before we grab our cleaning sprays and cloths, we must address safety. Working on an HVAC system involves both moisture and electrical currents, which is a combination that requires strict precautions.
First and foremost, never rely solely on the remote control to turn off the unit. Even when the display is dark, live voltage is still running to the air handler. You must locate your home’s main electrical panel and shut off the dedicated circuit breaker for the mini split. If your outdoor condenser has a dedicated local disconnect switch, pull the disconnect plug or flip the toggle to the "off" position.
Additionally, it is worth noting that modern inverter-driven mini splits contain large capacitors. These electrical components store power and can hold a high-voltage charge for several minutes even after the main power source has been disconnected. Once the power is off, wait at least 5 to 10 minutes before opening the chassis or touching any internal electrical terminals. For a deeper dive into safe handling and general upkeep, review our comprehensive Ductless AC Maintenance Best Practices.
Essential Tools for How to Clean the Indoor Air Handler on a Mini Split Safely
To perform a thorough, professional-grade cleaning without making a massive mess on your walls and floors, you will need to gather a few specific tools. Having these ready beforehand makes the process smooth and stress-free.
- Mini Split Cleaning Bag (Bib Kit): This is a funnel-shaped waterproof jacket that attaches to the wall directly under the air handler. It channels all the runoff water and cleaning solutions safely down into a five-gallon bucket.
- Non-Acidic, No-Rinse Foaming Coil Cleaner: Look for a pH-balanced, non-toxic, or enzyme-based formula (like Viper Evap+). Avoid harsh acidic or alkaline cleaners that can corrode the delicate aluminum fins of the evaporator coil.
- Microfiber Cloths: Perfect for wiping down plastic housings, louvers, and delicate sensor bulbs without scratching them.
- Soft Fin Brush or HEPA Vacuum: A vacuum with a soft brush attachment is ideal for gently drawing dry dust out of the coil fins.
- Pump Sprayer or Spray Bottle: Filled with clean, warm water to rinse down the fan wheel and coils.
- Safety Goggles and Gloves: To protect your eyes and skin from dripping cleaning solutions and flying dust particles.
Step-by-Step Guide: How to Clean the Indoor Air Handler on a Mini Split
Now that your workspace is prepped, your power is safely disconnected, and your tools are ready, we can begin the cleaning process.
To help you visualize your maintenance routine, here is a quick breakdown of how standard monthly upkeep compares to a deep annual cleaning:
| Maintenance Task | Monthly Basic Cleaning | Deep Annual Cleaning |
|---|---|---|
| Clean Air Filters | Yes | Yes |
| Wipe Down Outer Chassis | Yes | Yes |
| Vacuum Evaporator Coils | No | Yes |
| Apply Foaming Coil Cleaner | No | Yes |
| Wash Blower Wheel | No | Yes |
| Flush Condensate Drain Line | No | Yes |
| Inspect Electrical Connections | No | Yes |
Step 1: Removing and Washing the Air Filters
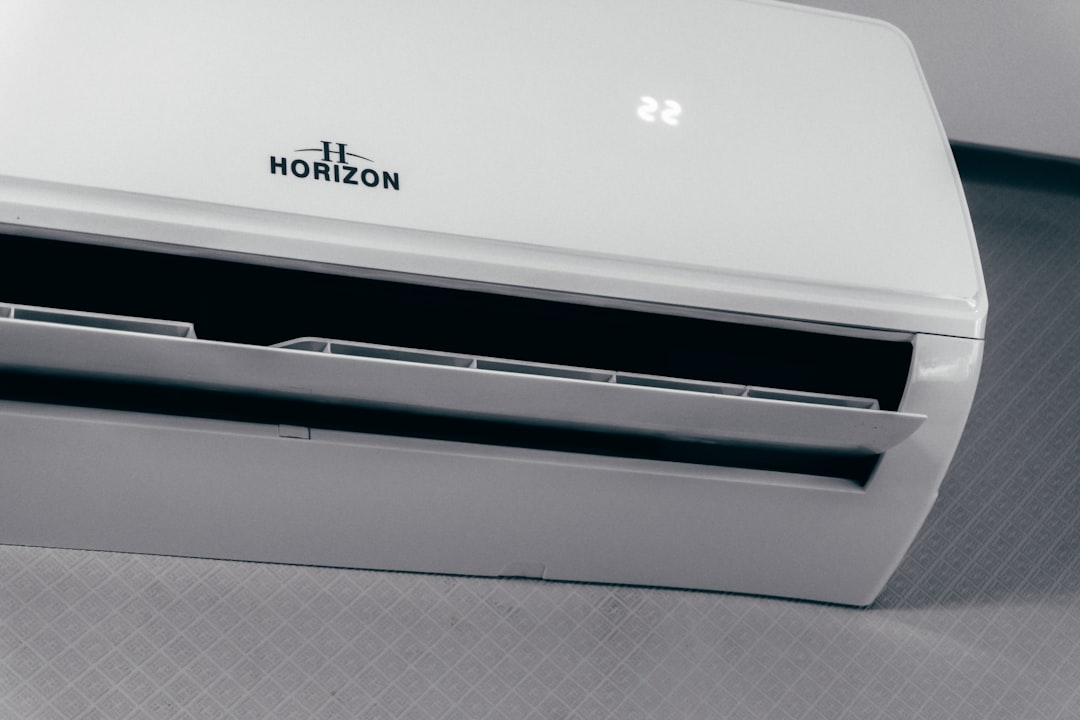
The air filters are your system's first line of defense. Keeping them clean is the easiest way to maintain optimal airflow. To access them, gently lift the front plastic panel of the air handler until it clicks into its open position.
Locate the filter tabs at the bottom of the filters. Push the tabs up slightly to release them from the retaining slots, then slide the filters down and out of the unit. On some modern mini split models, the filters slide out of the top of the chassis rather than the front.
Take the filters outside or to a large sink. Use a vacuum to remove loose dust, then wash them from the back side first with warm water and a mild dish soap. Washing from the back forces the trapped dust out the front, preventing it from getting embedded deeper into the mesh. Never use harsh chemical household cleaners on the filters, as these can degrade the filter material. Allow them to air dry completely in a clean area before reinstalling them. Putting damp filters back into the unit can trap moisture and trigger immediate mold growth. For more localized advice on keeping your system running smoothly, see our Mini Split Maintenance Tips Palmdale.
Step 2: Cleaning the Evaporator Coils
With the filters removed, the shiny aluminum evaporator coils are now exposed. These coils are incredibly delicate; the thin aluminum fins can bend at the slightest pressure.
Start by using a vacuum with a soft brush attachment to gently sweep away loose, dry dust. Always brush vertically, following the direction of the fins. Brushing horizontally will bend the fins and restrict airflow.
Next, secure your mini split cleaning bib kit under the unit. Shake your can of no-rinse foaming coil cleaner and spray it generously across the entire surface of the coils. The foam will expand, penetrating deep between the fins to break down grease, dirt, and organic matter. Let the cleaner sit for 10 to 15 minutes. As the foam breaks down, it liquefies and drains naturally into the condensate pan beneath the coils. If you are doing a deep clean, you can use a pump sprayer filled with clean water to gently rinse the coils, ensuring all loosened grime is washed down into the drain pan.
Step 3: Cleaning the Blower Wheel and Fan Blades
The blower wheel (often called the squirrel cage fan) is located deep inside the horizontal air outlet. It is responsible for pulling air across the coils and pushing it into your room. Over time, a thick layer of dust and mold can coat the individual curved blades of this wheel, drastically reducing airflow and causing the unit to wobble or vibrate.
With your cleaning bib securely in place, shine a flashlight up into the air outlet to locate the blower wheel. Spray the wheel generously with your non-toxic cleaner or a mild soapy water solution. Let it sit for a few minutes to loosen the stubborn grime.
Using a soft brush or a specialized mini split cleaning brush, gently scrub between each individual fan blade. Rotate the wheel slowly by hand to clean all sides. Once scrubbed, use a pump sprayer filled with clean water to rinse the wheel thoroughly. Watch as the dark, dirty water drains down into your bib kit and bucket. If your fan has been making strange squeaking or rattling sounds due to dust imbalance, this step should resolve it. For more details on diagnosing strange system sounds, check out Troubleshooting Mini Split Noises.
Step 4: Flushing the Condensate Drain Line
The moisture that drips off your evaporator coils collects in a plastic drain pan directly beneath the coils, which then channels the water outside through a narrow condensate drain line. Because this line is constantly wet, it is highly susceptible to algae, mold clogs, and dust buildup.
To clean the line, locate the drain pan connection inside the air handler. Pour a mixture of warm water and white vinegar (or a dedicated condensate pan cleaner) directly into the drain pan. The vinegar's natural acidity will break down algae and prevent slimy clogs from forming.
Go outside to where the drain line exits your home. Ensure that water is flowing freely. If the line is completely clogged and water is backing up into your indoor air handler, you can use a wet/dry vacuum attached to the end of the outdoor drain line to safely suck out any stubborn clogs or debris. Keeping this line clear is essential for preventing water damage to your drywall. For a deep dive into maintaining your system's drainage, read our guide on Mini Split Drainage Maintenance Palmdale.
Common DIY Mistakes to Avoid During Mini Split Maintenance
While cleaning your mini split is a highly rewarding DIY project, there are a few common pitfalls that can lead to expensive repairs if you aren't careful:
- Using Harsh Chemicals: Never use bleach, highly acidic cleaners, or abrasive household sprays on your coils or filters. These chemicals can eat away at the protective hydrophilic coating on the aluminum coils, causing pinhole refrigerant leaks over time.
- Bending the Fins: Avoid using stiff-bristled brushes, metal tools, or high-pressure washers on the evaporator coils. If you do accidentally bend a few fins, you will need to use a specialized plastic fin comb to gently straighten them back out.
- Spraying the Electronics: Every mini split air handler has a control board and electrical connections, typically located on the right-hand side of the unit. Always cover this electrical section with plastic wrap or a small plastic bag before spraying any liquids.
- Reinstalling Damp Filters: We cannot stress this enough—make sure your filters are 100% dry before putting them back. Dampness invites mold growth within hours.
- Using Compressed Air on Coils: Blasting the coils with compressed air or high-pressure nitrogen often blows the dirt deeper into the dense coil structure rather than removing it, packing the blockage tight.
If you encounter issues or find that your system is flashing a strange light after cleaning, refer to our troubleshooting guide to Troubleshoot Mini Split Errors.
When to Call a Professional HVAC Technician in the Antelope Valley
While regular filter washing and basic coil spraying are fantastic DIY tasks, there are times when a professional touch is absolutely necessary.
If you open your air handler and find a thick, black layer of mold covering the entire blower wheel and inner chassis, a simple spray bottle won't suffice. Deep, heavy mold remediation often requires partial disassembly of the unit, including removing the drain pan and the blower wheel itself. Doing this incorrectly can break the delicate plastic clips, crack the drain pan, or damage the fan motor bearings.
Additionally, if you notice ice forming on your evaporator coils during operation, or if the unit simply isn't cooling your home despite having clean filters and coils, you may be dealing with a refrigerant leak. Handling refrigerant requires specialized tools, EPA certification, and professional diagnostic equipment to measure system pressures and temperatures accurately.
If you suspect your system was not positioned optimally to begin with, causing it to collect dust faster, you might want to look into how to Optimize Your Ductless AC Placement. And if you are considering adding a new zone to your home, our Mini Split Installation Guide is an excellent resource to help you plan the project.
Frequently Asked Questions About Mini Split Cleaning
How often should I clean my mini split indoor unit?
For the best performance, you should clean the reusable air filters every two to four weeks, especially during the high-use summer and winter seasons. The deep cleaning process—which includes treating the coils, cleaning the blower wheel, and flushing the drain line—should be performed at least once a year.
Can I use household chemical cleaners on my mini split coils?
No, we strongly advise against using standard household cleaners like window sprays, bleach, or bathroom disinfectants. These products can strip the protective coatings off the aluminum fins, release harmful volatile organic compounds (VOCs) into your indoor air, and damage the plastic parts of the chassis. Stick to non-acidic, pH-balanced foaming cleaners specifically labeled for HVAC coils.
What happens if I run my mini split with dirty filters?
Running your system with dirty filters restricts airflow, which forces the fan motor to work harder and consume more electricity. This restriction can cause the temperature of the evaporator coils to drop below freezing, leading to ice buildup on the coils. Eventually, this extra strain can cause the system to shut down entirely or suffer a premature compressor failure.
Conclusion
Taking the time to understand how to clean the indoor air handler on a mini split is a fantastic investment in your home’s comfort, your family's health, and your monthly energy savings. By following these step-by-step instructions, you can keep your system running smoothly and efficiently for years to come.
However, if you find yourself facing a heavily soiled unit, a stubborn drain clog, or simply prefer to leave the deep cleaning to the experts, we are always here to help. Affordable Air and Heating has been family-owned since 1996, proudly serving our neighbors throughout Palmdale, Lancaster, Santa Clarita, and the surrounding Antelope Valley communities with reliable, energy-efficient solutions and flexible financing.
Ready to restore your system to peak performance? Reach out to us today to schedule our Professional Mini Split Services and let our experienced technicians handle the dirty work for you!